


Back
Iris
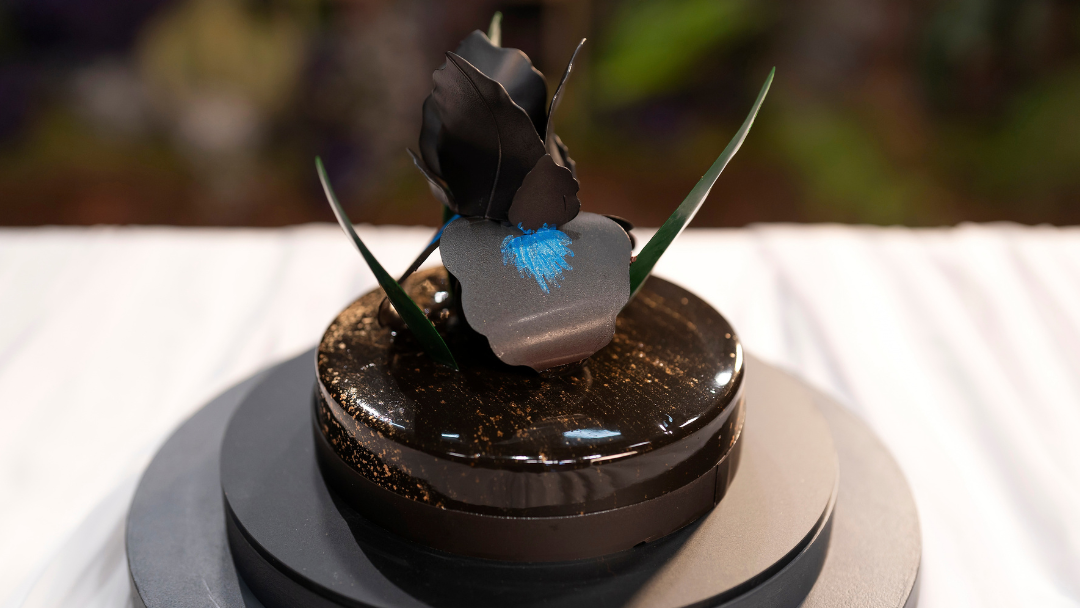

Recipe by Kirsten Tibballs
Try Kirsten Tibballs' Iris pressure test from Season 18 of MasterChef Australia today!
- Steps
- Ingredients
Ingredients
Cocoa Sablé
Milk Chocolate Crémeux
Chocolate Flourless Sponge
Caramelised Pecan Nuts
Dark Chocolate Mousse
Assemble the Entremet
Mirror Glaze
Chocolate Band
Chocolate Leaves
Chocolate Petals
Chocolate Disc
Chocolate Iris Assembly
Finishing Colours
Glaze the Entremet
Final Assembly
Select All
Steps
- Preheat combi-oven to 170°C, fan 2.
- Prechill blast freezer to -40°C.
- Pre-heat dehydrator to 31°C.
- Place 200g bottle of Chef Rubber Black Onyx cocoa butter in the dehydrator.
- Place airbrush in the dehydrator.
For the Cocoa Sablé
- In the bowl of a stand mixer fitted with a paddle attachment, place the butter, sieved icing sugar and cocoa powder and beat on low speed to combine.
- Once combined, add the eggs, salt, and scraped vanilla seeds, and mix to combine. Discard vanilla bean.
- Add the almond flour, flour, and baking powder and mix until the ingredients just come together as a dough.
- Press the dough into a flat, even square approximately 1 inch thick and wrap in plastic wrap.
- Chill in the freezer for 15 minutes.
For the Milk Chocolate Crémeux
- In a small bowl of iced water, soak the gelatine until soft and pliable, then gently squeeze to remove excess water and set aside until required.
- Place the gold chocolate, milk chocolate and cocoa butter in a medium bowl and set aside.
- Meanwhile, place the cream, milk, vanilla and salt in a medium saucepan and bring to the boil.
- Place the egg yolks in a medium bowl. Whilst whisking, pour the boiled cream mixture over the egg yolk mixture and whisk until combined.
- Transfer the mixture back into the saucepan and stir continuously over low heat until it comes to 80˚C. Remove the saucepan from the heat, add the drained gelatine and stir until incorporated.
- Strain the anglaise over the chocolate and whisk until completely melted and incorporated.
- Place a silicon Flexipan 166mm disc mat on a baking tray. Divide the chocolate crémeux evenly between two cavities of a Flexipan, each cavity should be 200g. One crémeux layer is required.
- Freeze in the blast freezer for at least 1 hour until required.
Cocoa Sablé (Contd.)
- Prepare a perforated baking tray and two perforated silicone baking mats. Cut two sheets of baking paper to the size of the silicon mats.
- On the workbench, roll the dough between the sheets of baking paper to approximately 2mm in thickness.
- Using a 170mm ring, cut two discs, approximately 52g each, from the dough.
- Transfer the discs onto the tray lined with the silicon mat. Cover with the other silicon mat.
- Bake in the preheated oven for approximately 12 minutes, or until cooked through.
- Set aside at room temperature.
For the Chocolate Flourless Sponge
- Place the egg yolks and sugar (A) in the bowl of a stand mixer fitted with a whisk attachment and whip until pale and combined.
- In a clean stand mixer bowl fitted with a clean whisk attachment, whip the egg whites and cream of tartar to a soft peak.
- Gradually add the caster sugar (B) to the egg whites while continuing to whisk for 60 seconds until soft and glossy.
- In a microwave-safe bowl, melt the dark couverture chocolate in 30 second increments, stirring in between with a spatula.
- Fold the cocoa powder and melted dark couverture through the egg yolk mixture.
- Gently fold the chocolate mixture through the egg whites.
- Place a silicon Flexipan 166mm disc mat on a baking tray and prepare a 12mm round nozzle in a piping bag. Transfer the batter to the piping bag. Starting from 1cm above the centre of the mould, pipe a spiral of mixture into two cavities of the Flexipan. Smooth the surface with a small offset palette knife and tap out any air bubbles. One flourless sponge layer will be required. Discard remaining mixture.
- Bake in the preheated combi-oven for 7-8 minutes until cooked.
- Allow to cool at room temperature for 20 minutes, then place still in the mould into the blast freezer until required.
For the Caramelised Pecan Nuts
- Place whole pecan nuts on a small tray. Roast in the combi-oven for approximately 9-10 minutes until lightly roasted. Then set aside to cool at room temperature.
- Place the honey, cream, and glucose in a small saucepan and bring to the boil.
- In a separate medium saucepan over medium high heat, place the sugar and dry caramelise until sugar is dissolved and caramel is a deep amber colour.
- Deglaze the caramelised sugar with the hot cream mixture then add the salt.
- Place the milk couverture into a medium bowl then pour the caramel over. Whisk until completely melted and incorporated.
- Using a mini-chop attachment on a stick blender, finely chop the pecan nuts.
- Finely chop the candied lemon fillets and set aside in a small bowl.
- Add pecan nuts and candied lemon to the hot caramel mixture and stir through.
- Line a baking tray with baking paper and place the two sablé discs on top.
- Spray two 160mm cake rings and line the inner circumference with a strip of baking paper. Centre each ring on top of a sablé disc.
- Transfer 140g of the caramelised pecans into each ring and spread evenly.
- Place in the freezer to cool until required.
For the Dark Chocolate Mousse
- Place the dark and milk chocolate into a medium bowl and set aside until required. Prepare an ice bath.
- In the bowl of a stand mixer fitted with a whisk attachment, place the cream and whisk on medium high until semi-whipped, until the cream has some body but still collapses. Set bowl aside in the fridge until required.
- In a small bowl of iced water, soak the gelatine until soft and pliable, then gently squeeze to remove excess water and set aside until required.
- Place the egg yolks and sugar (A) in a medium bowl and whisk to combine.
- In a medium saucepan over high place the milk and sugar (B) and bring to a boil.
- Whilst whisking, pour the hot milk mixture over the combined egg yolks and sugar to incorporate.
- Return the mixture to the saucepan and stir continuously over low heat until it reaches 80°C to create an anglaise.
- Remove from the heat, immediately add the pre-soaked gelatine, and stir until incorporated and fully dissolved.
- Strain the anglaise over the chocolate and whisk by hand until the chocolate is completely melted and incorporated. Add the salt and stir to combine.
- Place the mixture over an ice bath and stir constantly, allowing the mixture to cool to 34°C.
- Once it reaches temperature, fold in the semi-whipped cream.
- Transfer into a piping bag and assemble immediately.
To Assemble the Entremet
- Line the sides of a 180mm cake ring with a strip of acetate 45mm x 180mm, then place on a baking tray lined with a silicon mat.
- Snip the top of the piping bag to create a 1cm hole. In a spiral shape starting from the outer ring, pipe approximately 215g dark chocolate mousse into the base to cover.
- Use the back of a large offset palette knife to spread the mousse up the sides of the ring to the top.
- Unmould, then place a disc of flourless chocolate sponge on top of the mousse, followed by another 190g layer of dark chocolate mousse.
- Place a frozen disc of milk chocolate crémeux on top, and an additional 140g layer of dark chocolate mousse, then smooth over with the palette knife.
- Lastly, top with the chocolate sablé, with the caramelised pecan nut side down. Press the sablé down into the mousse so it is flush with the top of the cake ring and the mousse fills the gap around the edges of the caramelised pecan nuts. If required, add additional mousse to level.
- Place into the blast freezer to freeze completely before glazing.
For the Mirror Glaze
- In a small bowl of iced water, soak the gelatine until soft and pliable, then gently squeeze to remove excess water and set aside until required.
- Meanwhile, in a large saucepan bring the water (A), sugar, glucose and salt to a boil.
- Immediately add in the neutral glaze and whisk while the mixture is at a simmer.
- In a medium bowl, combine the water (B) with the cocoa powder and add it to the simmering syrup.
- Sieve in the black oil-soluble powder and add in the drops of black colour.
- Whisk to combine for a minute, then remove from the heat.
- Add the pre-soaked gelatine sheets and emulsify with a stick blender.
- Strain the glaze into a shallow tray, cover the surface with plastic wrap to ensure a skin does not form and refrigerate. When ready to use, ensure the glaze is at 30°C.
For the Chocolate Band
- Sift black powder into tempered chocolate and stir with a spatula to combine until fully incorporated.
- Place two 20mm x 600mm acetate strips on top of a marble board. Place a prepared strip of baking paper 50mm x 600mm and a 180mm cake ring nearby.
- Pour some dark tempered chocolate over the acetate strips, then using an offset palette knife, spread it into a 1-2mm, even layer.
- Lift the acetate strips and transfer onto a clean area of your workbench to set.
- Canola spray the outside of the 180mm cake ring then apply the prepared baking paper strip to the outside, ensuring it is smooth and bump free.
- Once the chocolate is no longer sticky and is set to the touch.
- Wrap the chocolate/acetate strip around the baking paper lined 180mm cake ring with the chocolate set against the baking paper and secure the outer acetate with tape. Secure the second band above the first on the same cake ring. 1 chocolate collar is required.
- Set the ring on a baking tray.
- Allow the chocolate to crystallise in a cool, dry area for 10 minutes. Then place in the fridge for 15 minutes, then set aside until required. Scrape the marble board clean.
For the Chocolate Leaves
- Place 2 small and 3 large guitar sheet leaf templates on the marble board. 2 large and 1 small chocolate leaf will be required.
- Place the white chocolate in a microwave safe bowl and sieve in the two oil soluble colours. Stir to combine.
- Temper the coloured white chocolate by placing it in the microwave in 30 second increments, stirring in between, until the chocolate is half liquid and half solid chocolate.
- Stir vigorously until all the chocolate melts. If you have some resistant chocolate, you can use a heat gun to briefly and gently warm the chocolate while stirring. Working temperature for the tempered chocolate is 29-30°C.
- Mix 100g of the tempered white chocolate with the tempered dark chocolate. Discard remaining white chocolate.
- Spread the chocolate to approximately 2mm in thickness onto the curved side of each leaf shaped template.
- Leave at room temperature to set for 10 minutes before transferring to a small baking tray and placing in the fridge for no more than 5 minutes. Leave the plastic on until applying to the cake. Scrape the marble board clean.
For the Large Chocolate Petals
- Place 6 large petal templates on the marble board. Line a tray with baking paper and place 1 x 90mm ring cutter, open side down, on top. 3 large chocolate petals will be required.
- Using a small offset palette knife, spread an even 1mm layer of chocolate on a large petal, then rest the petal inside the 90mm ring, curved like a boat, with just the base and tip touching the ring as it semi-sets. Repeat process with the next large leaf, removing the ring from the previous semi-set chocolate leaf to use again. The leaf should retain the curled edges as it fully sets on the tray.
- Set at room temperature for 10 minutes, then transfer to the fridge for 5 minutes.
- For the Small and Medium Chocolate Petals, place two 50mm orange silicon sphere moulds upside-down onto baking trays.
- Place 6 medium petal templates and 6 small petal templates on top of the marble board. 3 of each size petals will be required.
- Using a small offset palette knife, spread an even 1mm layer of tempered chocolate on each curved top side of the petal, then using the tip of a knife to assist, place each petal template on top of a sphere on the upside-down mould to support the curve as it sets.
- Set at room temperature for 10 minutes, then transfer to the fridge for 5 minutes.
- Once petals fully set, peel the plastic off and set aside on a lined baking tray.
- To create detail on the medium petals, place tempered dark chocolate into a small paper piping bag and cut 1mm off the end.
- Down the centre of each medium petal, on the curved under side, pipe a line of chocolate. Leave at room temperature to set. Reserve piping bag of tempered chocolate.
For the Chocolate Disc
- Line a baking tray with baking paper. Place a 40mm round cutter nearby. Place a sheet of acetate 200mm x 100mm on the marble board.
- To make a base for the Iris Flower, use a small offset palette knife to spread a 2mm layer of tempered dark chocolate onto prepared sheet of acetate. As it starts to set, mark 2-3 discs with a 40mm round cutter. Set at room temperature for 10 minutes, then transfer to the fridge for 5 minutes.
- Once the chocolate is set, remove the chocolate disk from the trimmings and set aside. One chocolate disc is required.
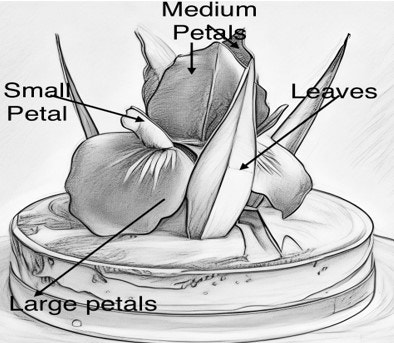
To Assemble the Chocolate Iris
- Wrap a medium pizza tray with plastic wrap.
- Using gloved hands, place the chocolate sphere on the wrapped pizza tray. Using the piping bag of tempered chocolate, place a dot of chocolate on the very top of the chocolate sphere, then place the chocolate disc on top, ensuring it is flat and centred. Set in place using magic freeze spray.
- Use a small knife to straighten the flat edge of each petal if required.
- To secure the large petal to the disc base, pipe a 10mm dot of chocolate on the underside of the straight edge of the petal. Immediately place the petal 10-15mm overlapping the disc, ensuring the petal tip is high enough that is will not touch the bench (or the finished entremet).
- Repeat the process with the other two large petals, overlapping and evenly spaced around the disc. Spray small amounts of freeze spray only as required.
- The 3 medium petals will sit evenly spaced on the large petals with their tips pointing up and the piped chocolate line facing out.
- Pipe a small amount of chocolate on the flat edge at the back of the medium petal and place it approximately 1cm above the point where two large petals overlap.
- Repeat the process with the remaining two medium petals. The edges of the petals should almost touch. Use freeze spray as required.
- Add the smallest petals, one at a time, with the tip facing out, piping chocolate along the flat edge. Place these petals evenly between the medium petals with the back of the petal resting on the edges of the medium petals.
For the Finishing Colours
- Transfer the flower to the spray booth. Remove the airbrush gun and black cocoa butter from the dehydrator.
- Pour the black cocoa butter into a small jug and ensure the temperature is at 31°C before filling the air brush chamber and sealing with the lid.
- Spray the flower with the black cocoa butter, keeping a 30cm distance between the spray gun and the flower, and ensuring it is sprayed from all angles.
- For the Iris colour, place the gold glitter powder in a small glass bowl. Using a small sieve, sift the blue powder over the top. Pour on the alcohol without mixing, so the colours remain mostly separated.
- Using a small artist brush, dip the paintbrush into the bluest colour and dab off excess liquid on the side of the bowl. Paint blue feathered stokes radiating from the centre of the large petals, brushing 25mm down and 35mm wide, downwards in uneven strokes. Then top with gold highlights from the bowl, in the same downward strokes. Mix in more alcohol from the edges of the bowl to the powder colours as required to create the paint.
- Set aside at room temperature.
To Glaze the Entremet
- Sit an 11cm tart ring on an orange flexipat mat.
- Unmould the frozen entremet from the ring and remove the sheet of acetate. Use a heat gun to gently warm the ring if difficult to remove.
- Turn the frozen entremet upside down, with the sablé on the base, and transfer the cake to sit on top of the 11cm tart ring.
- To smooth and round the top edge of the cake, using gloved hands, use the middle of your palm to go over and evenly round the sharp edge of the entremet.
- When ready to use, ensure glaze is at 30°C. Re-heat if required with small bursts of heat in the microwave.
- Transfer to a jug and re-emulsify the glaze with a stick blender keeping the blade of the stick blender below the surface to prevent any air bubbles forming.
- For the glaze and marble effect you must work very quickly. Have a large straight palette knife ready nearby.
- With the jug of mirror glaze, aim to pour in one continuous motion. Begin pouring in the very centre of the cake, moving outwards in a circular motion until top and sides are covered seamlessly.
- For the gold decoration, using a small fine sieve, immediately sprinkle the gold powder randomly across the glazed surface.
- Ensuring the blade is touching only the glaze not the cake, position a large straight palette knife parallel to the cake surface and tilted at a 45° angle. Without hesitating, in one swift motion, swipe off the excess glaze over one side, lifting the palette knife upwards before reaching the edge to keep the glazed surface intact.
- Before the glaze sets, use a small sharp knife to quickly pop any bubbles that may have formed on the surface and trim any drips from underneath the glazed cake.
- Carefully lift the glazed entremet off the cake ring and transfer to the serving plate, using a paring knife to assist if required. Transfer to the fridge until required.
Final Assembly
- Cut the tape, remove the chocolate band from the ring and remove the acetate.
- Very gently stretch the edges of the set chocolate band slightly and place around the glazed entremet. Turn the entremet towards you with the best side facing you.
- Carefully transfer the sprayed chocolate iris to the centre of the glazed entremet.
- To insert the leaves, on your left side, insert a large leaf approximately 10-15mm away from the base of the chocolate sphere, pushing through the glaze between two of the large petals. Repeat with another large leaf on the right side. Then push the small leaf through the glaze at the front between the last two petals. Once they are positioned, using the small piping bag of tempered chocolate, apply a dot of chocolate to where the leaf comes in contact with the petal.
